1 Parametrization for Route Scheduling
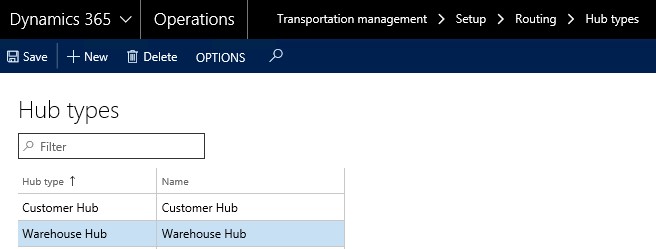
1.1 Transportation Management –> Setup –> Routing –> Hub types
Hub types are setup to classify hubs in terms of affiliation and function. In this example, two hub types are set up:
- Warehouse hub (internal hub)
- Customer hub (external hub)
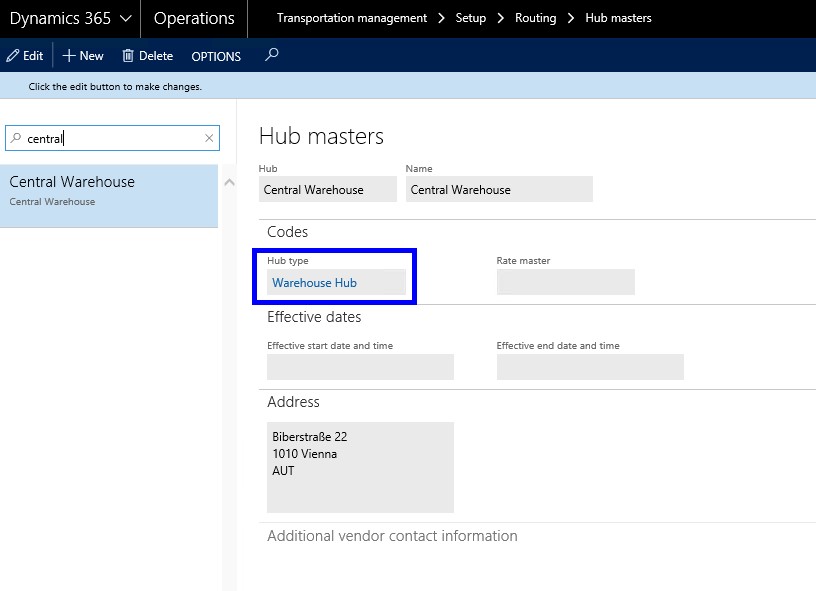
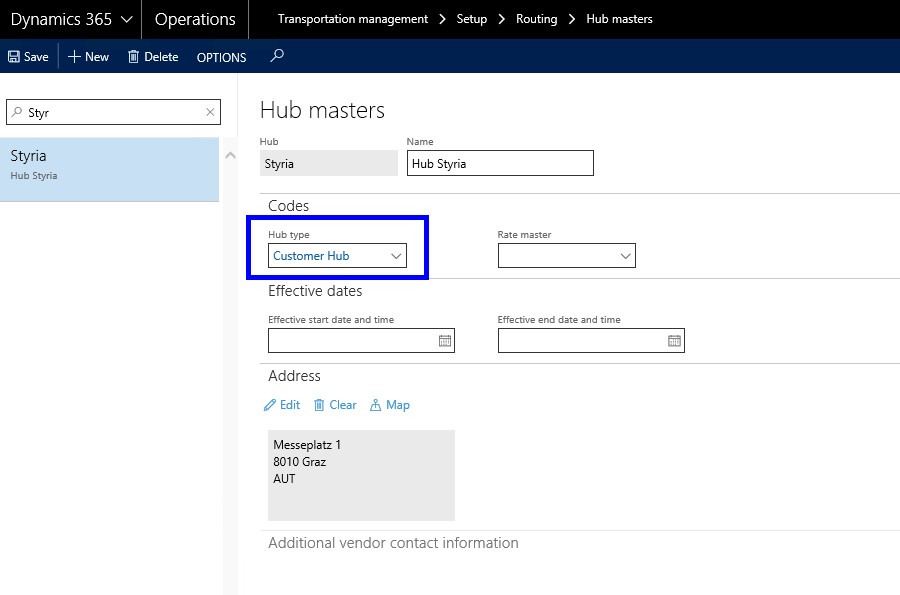
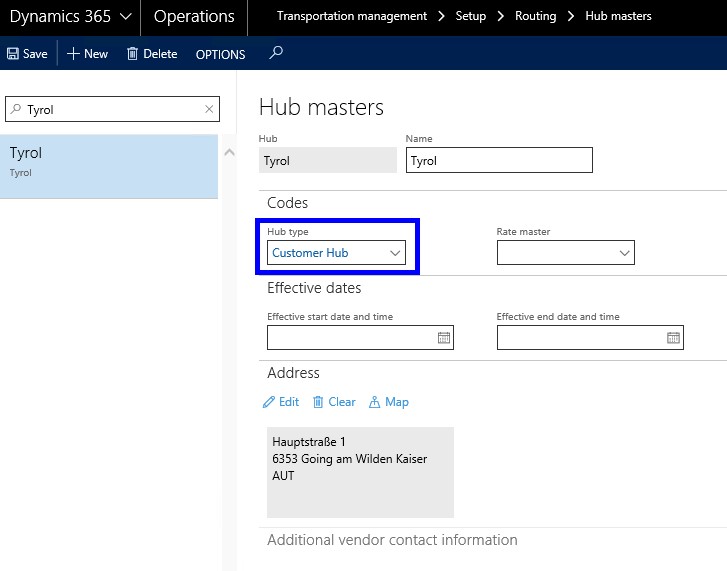
1.2 Transportation Management –>Setup –> Routing –> Hub Masters
Within this case study, we create four hubmasters:
- One hub master for the central warehouse (type “Warehouse hub”)
- Three hub masters for customer warehouses (type “Customer hub”)
It is necessary to assign an address to each hub master.

1.3 Transportation Management –> Setup –> Routing –> Route plans
First, we need to create a route plan starting from the warehouse where we ship from and with hubs that have the same zip code as the customers we are going to visit on the route. Our route plan has three different freight destinations:
- From central warehouse in Vienna to customer in Lower Austria
- From customer in Lower Austria to a customer in Styria
- From customer in Styria to customer in Tyrol
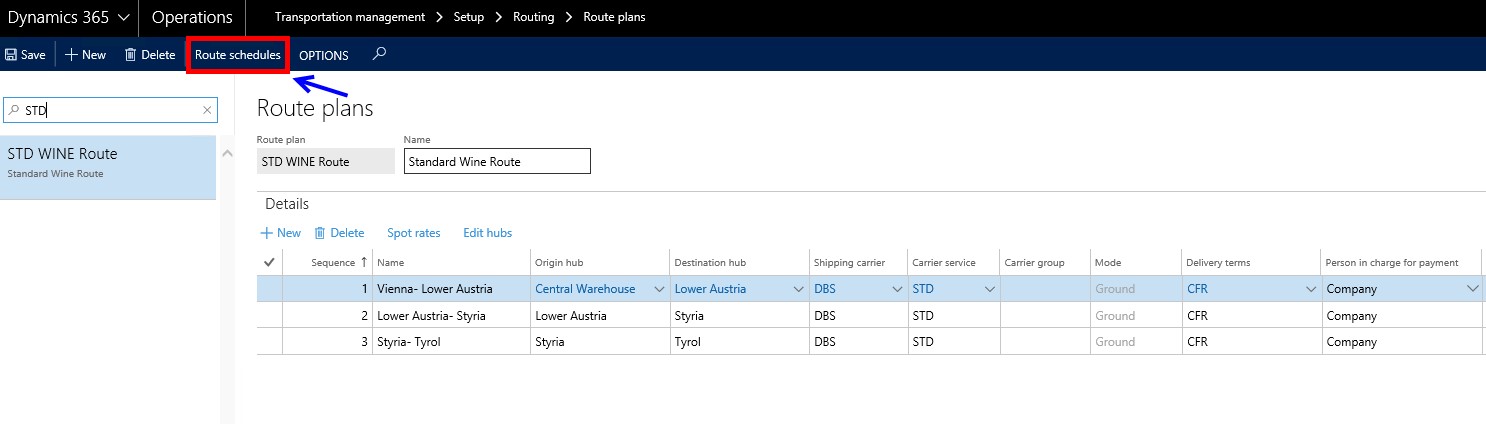
The following buttons and check boxes are relevant:
- In the “Person in charge for payment” field, we can select the party that is responsible for paying for the freight services.
- Optionally, we can select the vendor and the invoice account details for the vendor who will transport the freight
- Button “Create spot rates” allows to assign rates for each route segment
- To update the route hub configurations, it is possible to click on button “Edit hubs” to open the Route hub configuration
After all route segments have been set up, we click on button “Route Schedules” as shown in the screenshot above.
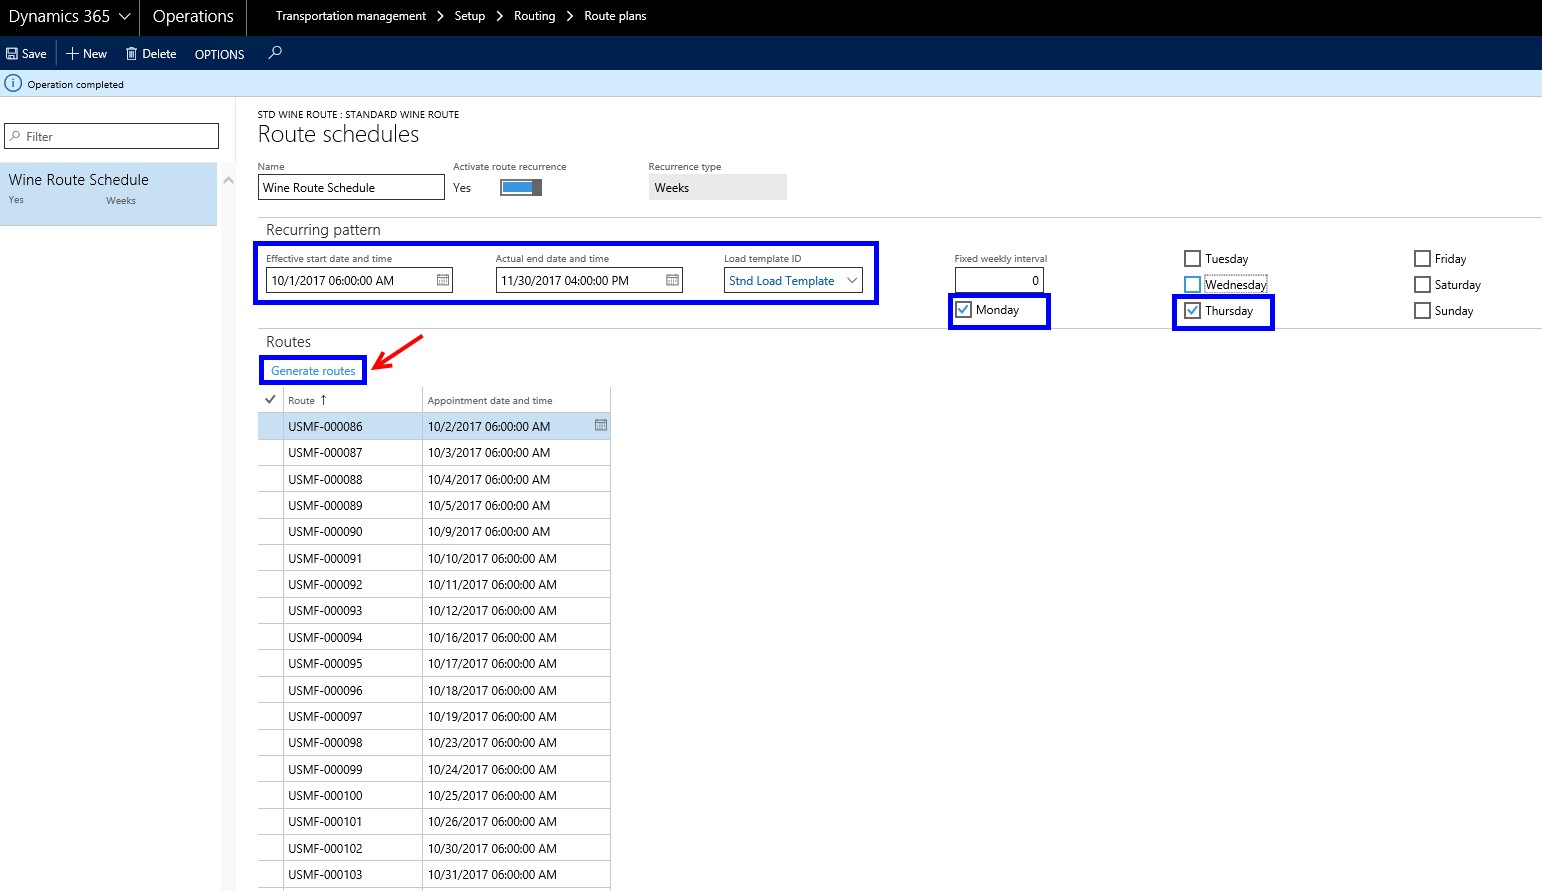
In the “Route schedule” form, we have to specify the “actual start date and time” and “actual end date and time” as the period we want to have the scheduled routes generated for. It is possible to specify the “Load template” which is being used as default on the “Load building workbench”. By clicking on “Generate Routes” button, a batch job is started generating routes based on the setup. In our example, we ship goods for this route plan two times a week (Monday and Thursday).
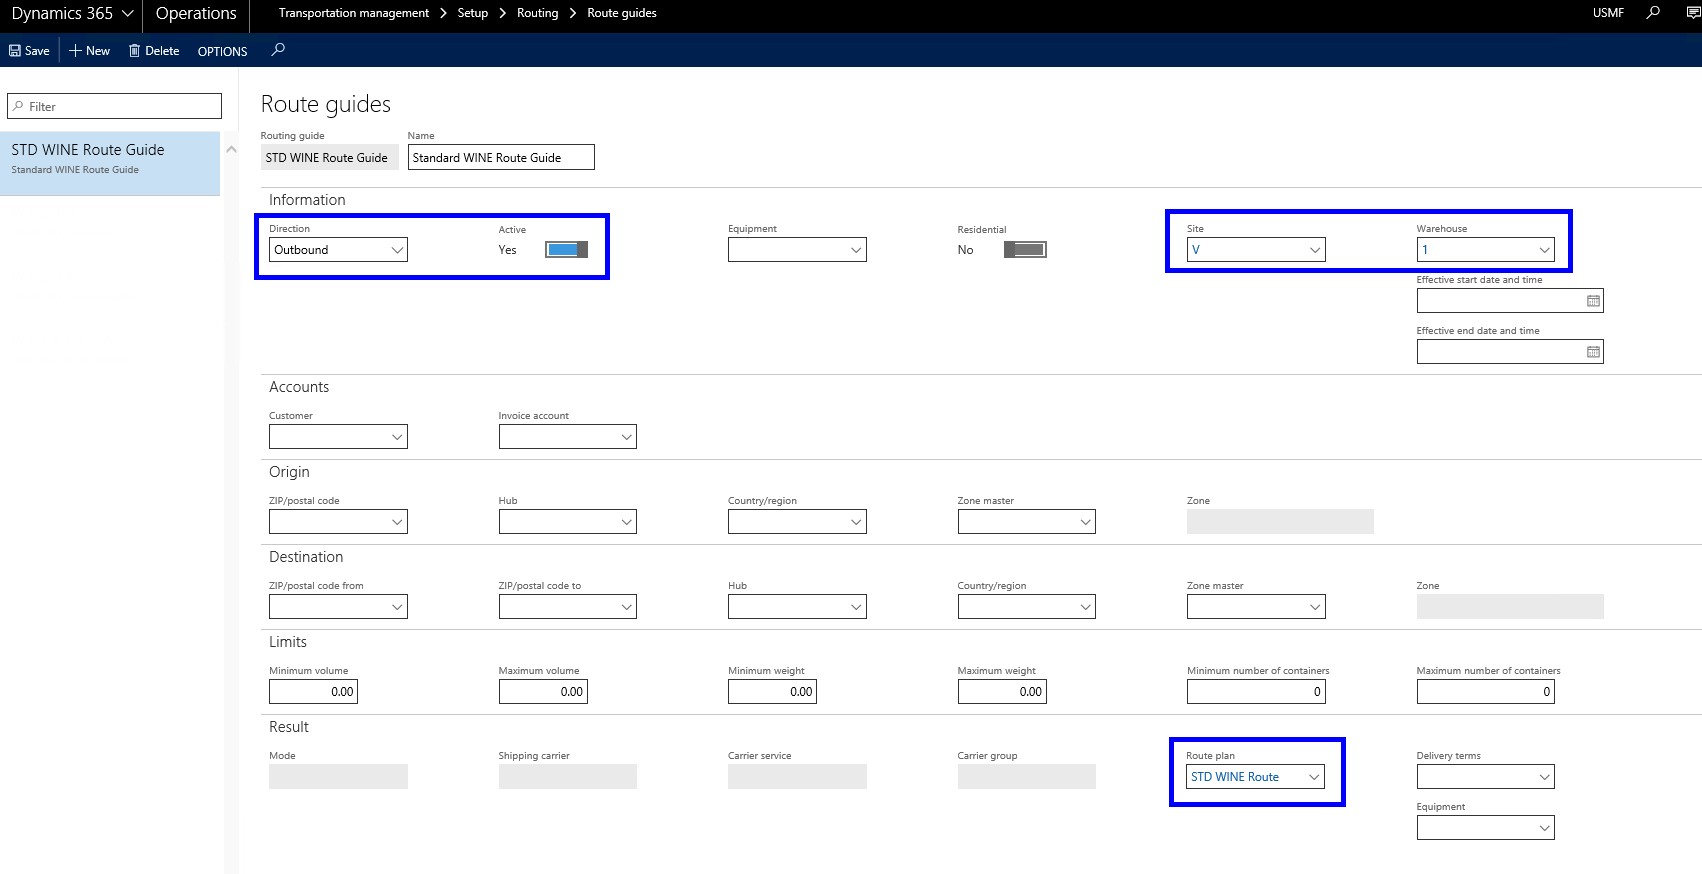
1.4 Transportation Management –> Setup –> Routing –> Route guides
To be able to use scheduled routes, a route guide has to be set up. The recommendation from Microsoft is the following: For scheduled route plans we should use one route guide and specify only the route plan, because the route plan used for scheduled routes is not open for any other criteria such as “Origin hub” and “Destination hub” as they are specified on all segments.
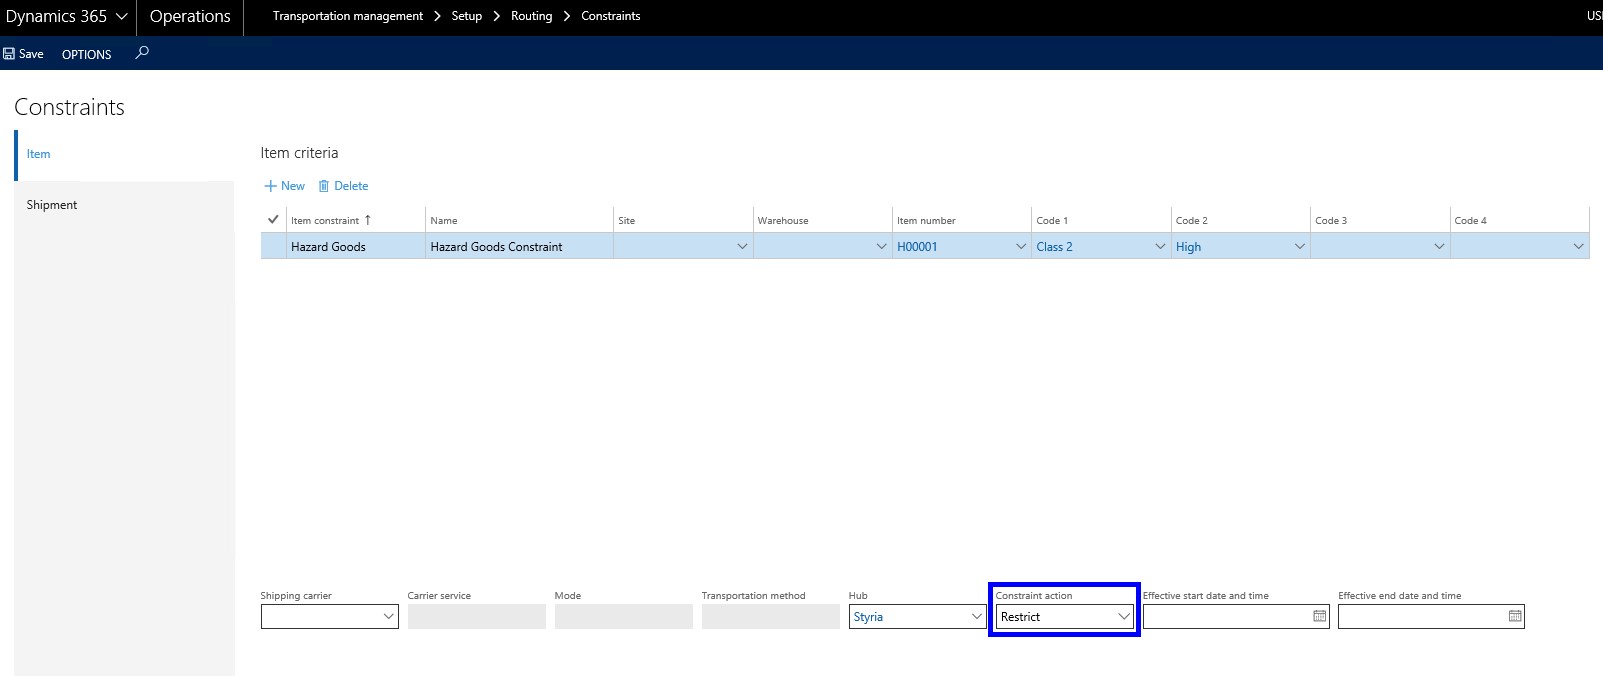
1.5 Transportation Management –> Setup –> Routing –> Constraints
In addition, it is possible to set up constraints for certain products that should not be delivered to a specific hub (only warning or restriction). For example, the screenshot below shows that product H00001 is not allowed to be delivered to hub “Styria”:
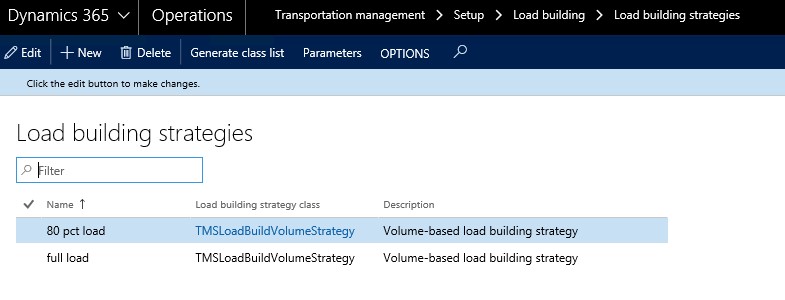
1.6 Transportation Management –> Setup –> Load building –> Load building strategies
Microsoft Dynamics 365 provides a load building strategy named “Volume-based load building strategy”. This strategy lets us use the maximum values specified for height and weight in the load template, or override the settings by entering new values.
In addition, it is possible to add our own load-building strategies by creating a new class in the Application Object Tree (AOT).
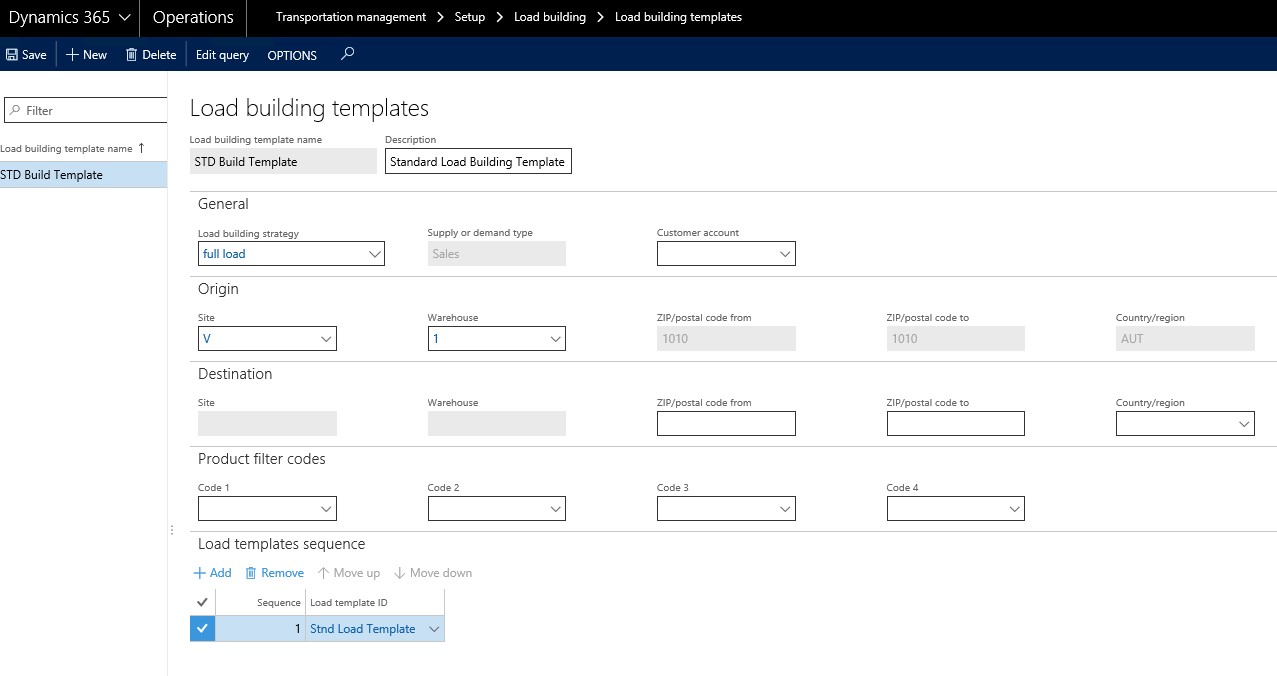
1.7 Transportation Management –> Setup –> Load building –> Load building templates
Load building templates are used to automatically create loads based on certain parameters. Our template uses the building strategy “full load” and is assigned to site and warehouse “V/1”. The sequence of assigned load templates regulates how load lines are assigned to loads during the load building process. By using the button “Edit query”, it is possible to restrict the template to certain criteria.
2 Process Simulation of Route Scheduling
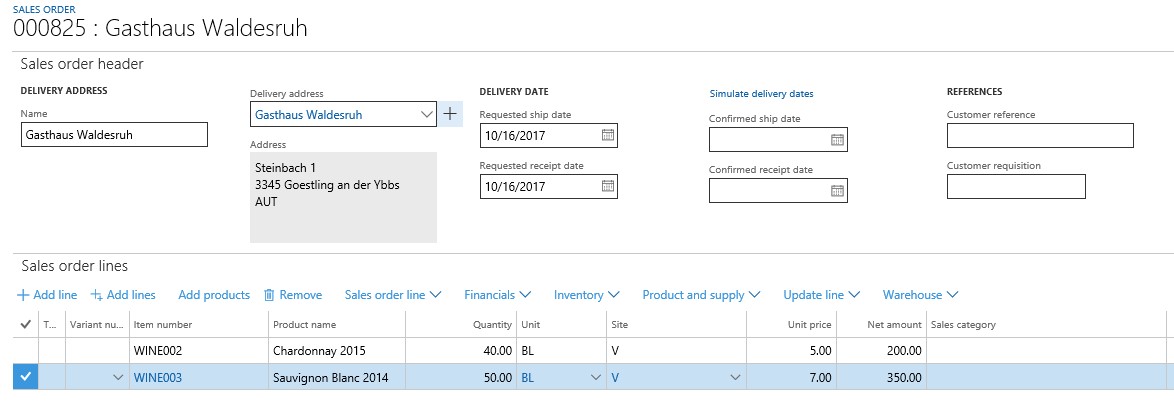
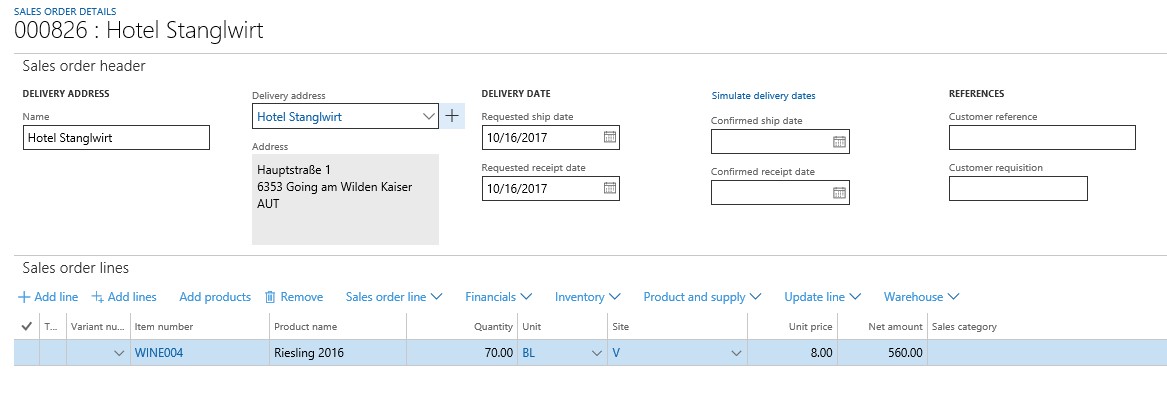
Two sales orders have been created which should be shipped in 16.10.2017:
- one sales order having two sales lines (000825)
- one sales order having one sales line (000826)
To create a load for these three sales lines and assign a route, we invoke “Transportation management à Planning à Load building workbench”. The load building strategy and the scheduled route (that has been created beforehand within the route plan) has to be entered before we click on button “Propose loads”:
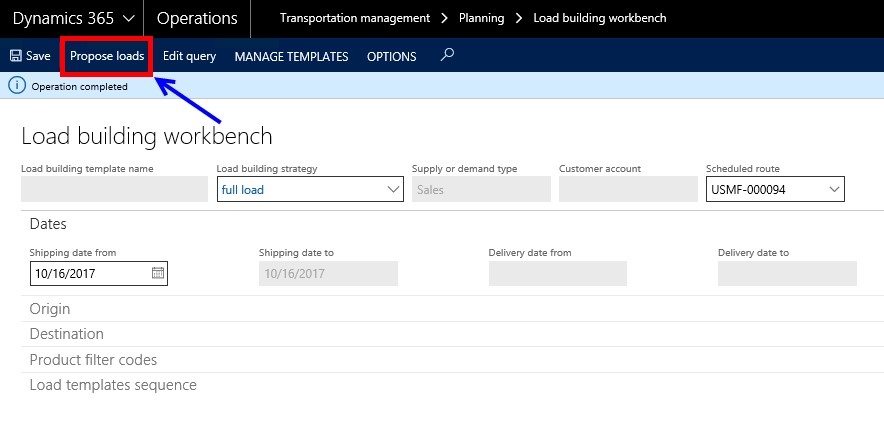
Thy system proposes to add these three sales lines into a new load:

Within the load, the assigned route can be inquired:
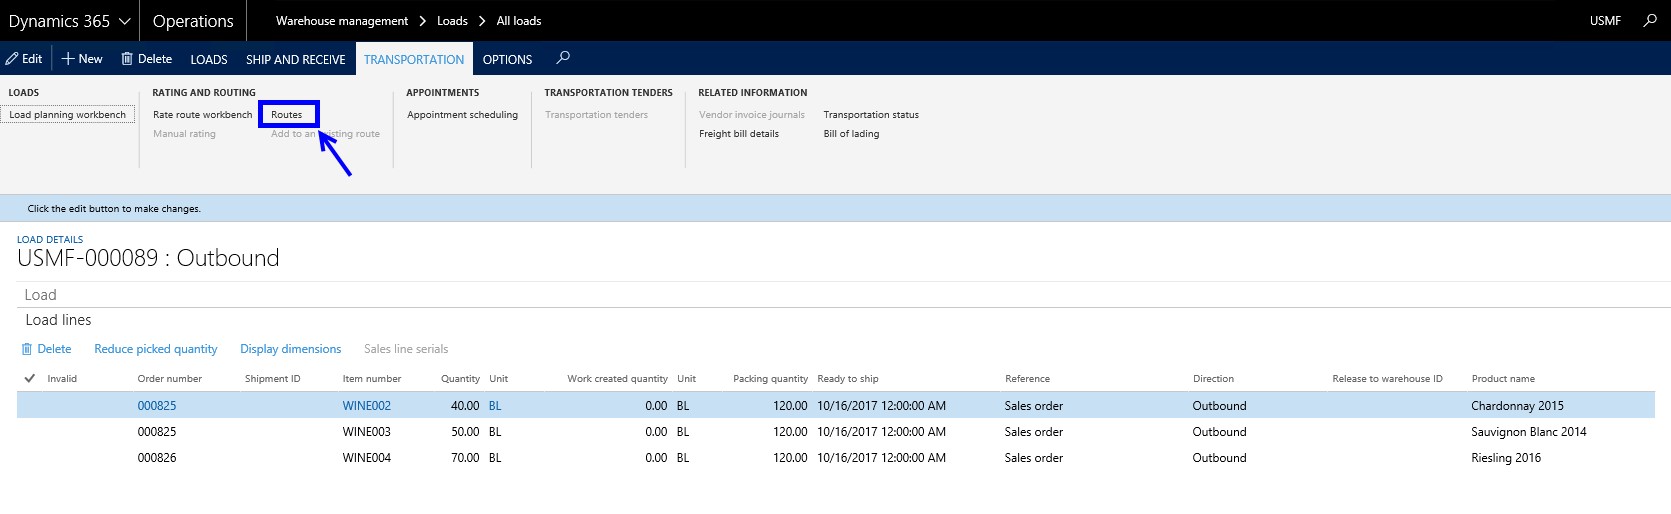
Now, we assume that an additional sales order should be included in the route on 16.10.2017:
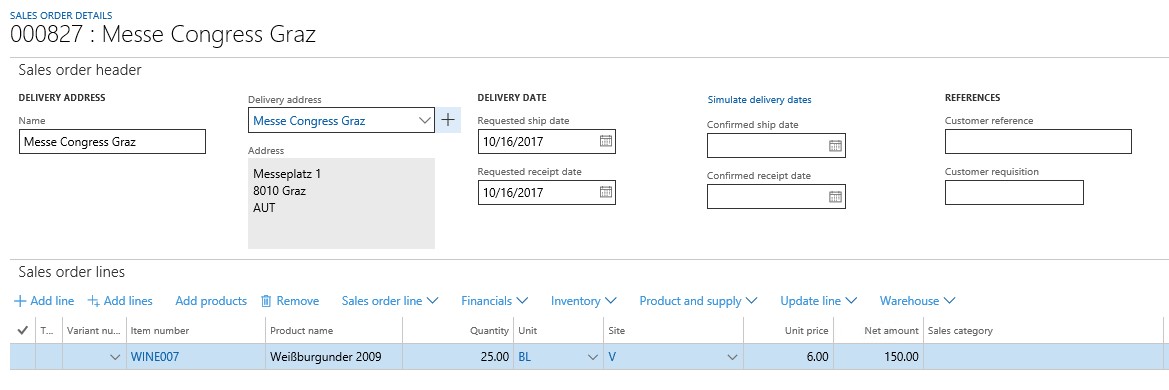
We assign the sales order to the existing load created before:
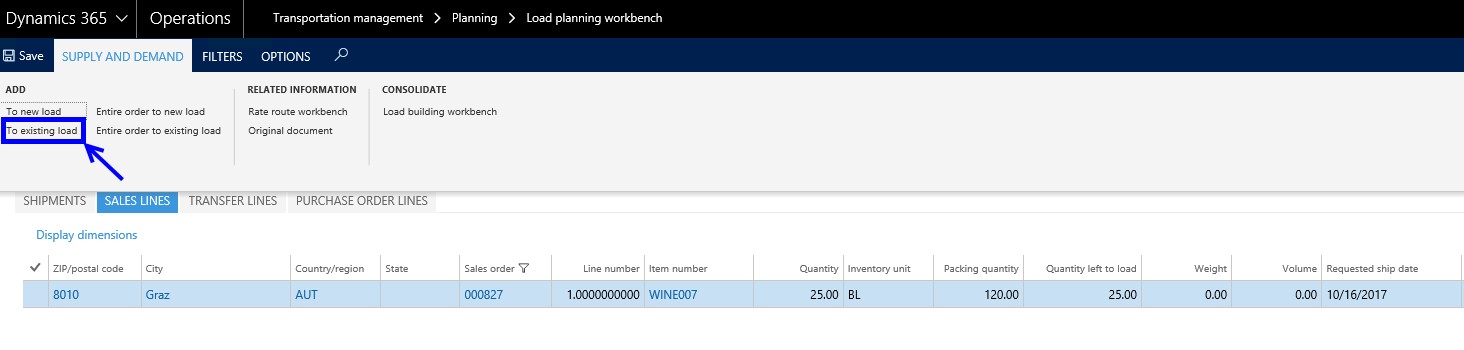
The load now possesses four sales lines. The route remains the same.

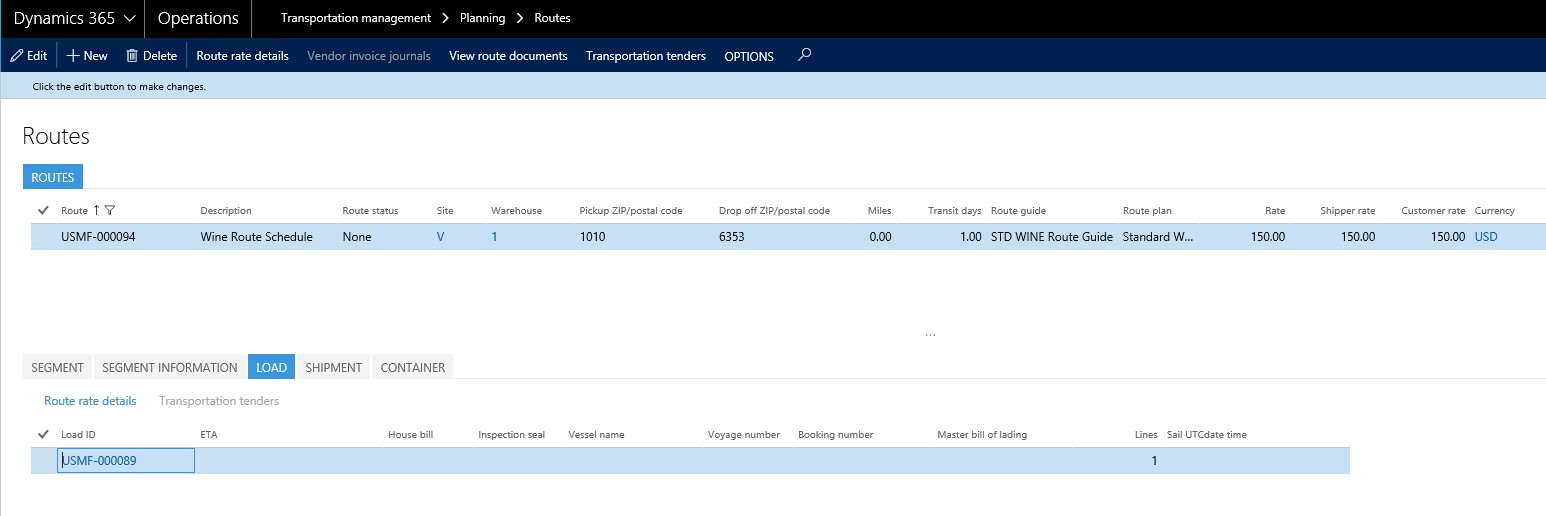
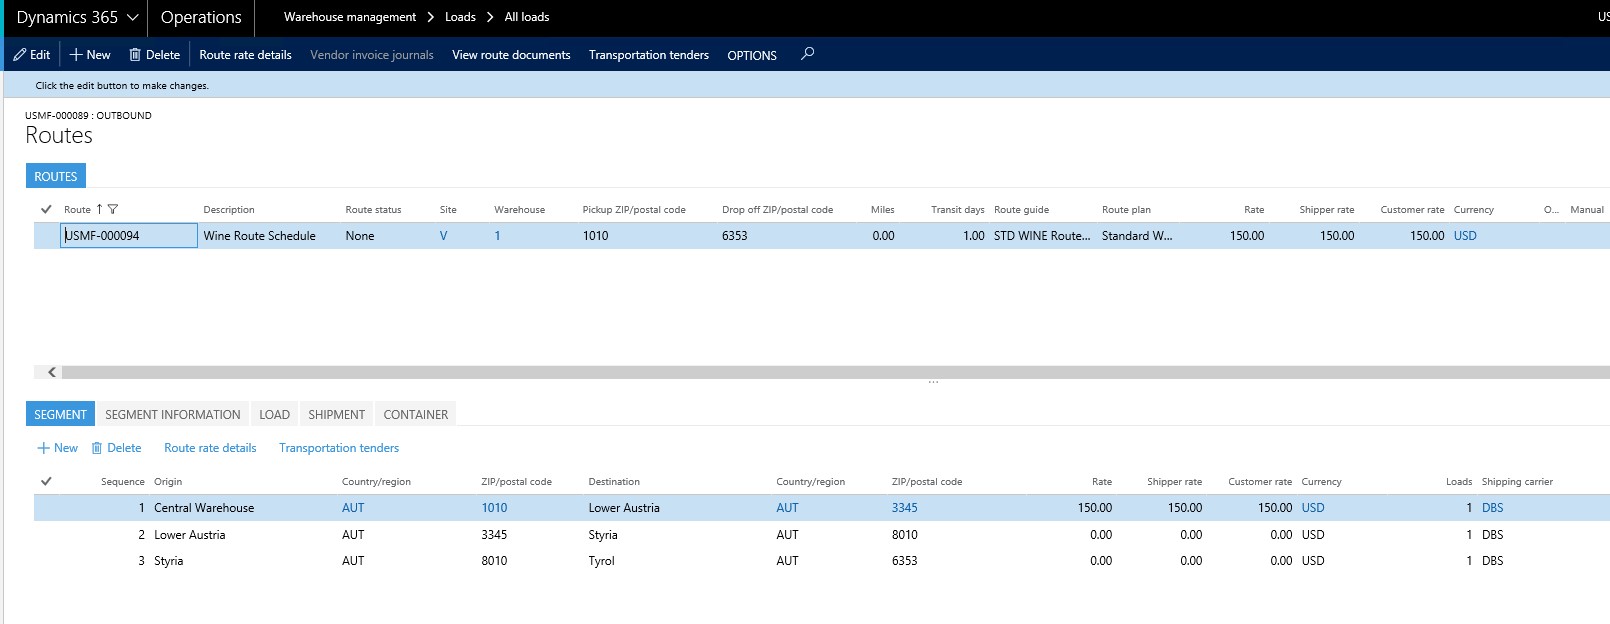
Also in form “Transportation management à Planning à Routes”, it is possible to look up the link between route and load.